Sourdough is naturally leavened bread, which means it doesn’t use commercial yeast to rise. Instead, it uses a ‘starter’ – a fermented flour and water mixture that contains wild yeast and good bacteria – to rise. This also produces the tangy flavour and slightly chewy texture you’ll find in sourdough. Wild yeast has more flavour than commercial yeast, and is natural in the sense that it doesn’t contain any additives.
How to make sourdough
Basic sourdough is made from nothing more than flour, water and salt – here’s what you need to know about each.
Salt – fine, pure sea salt is the best, but if you don’t have it, you can use any type of cooking salt you have, except rock salt – that will need to be crushed before using.
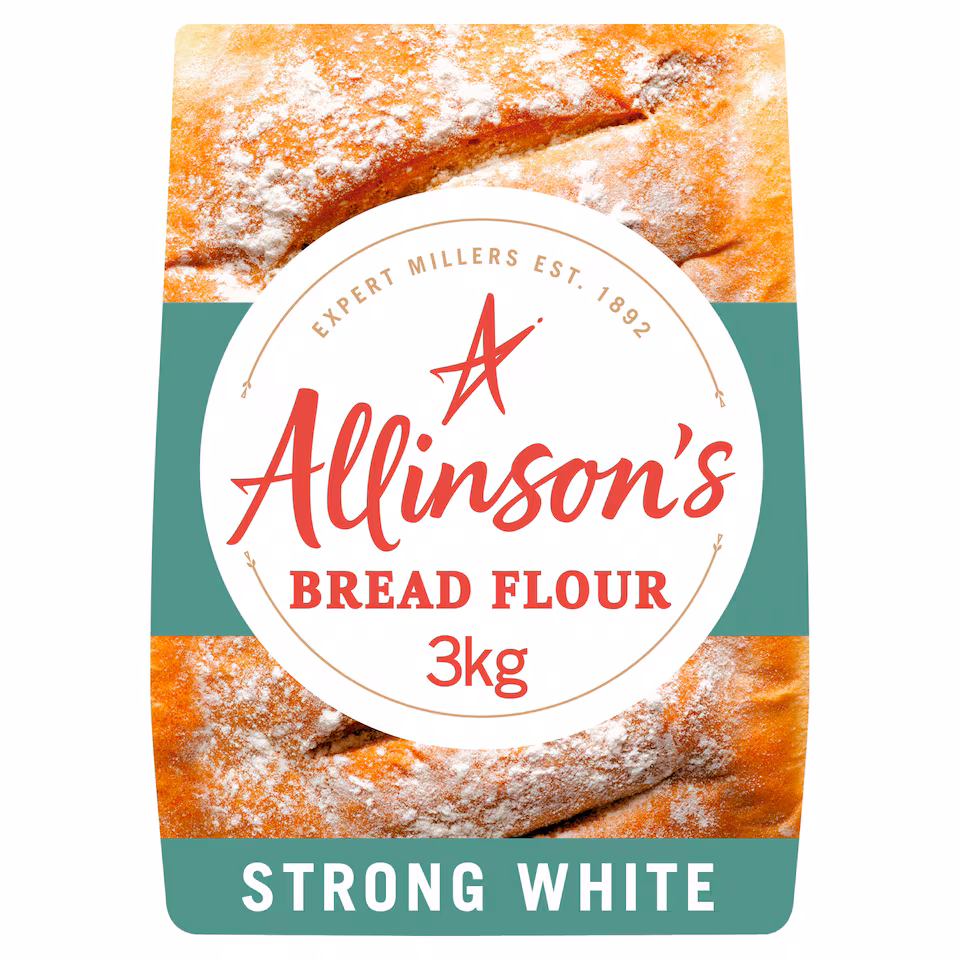
Flour – sourdough can be made with many types of flour, for this I will be using strong white bread flour. It’s the most readily available, and means you’ll only need to buy one flour to start.
Water – good old tap water is absolutely fine. In some areas where you have hard water you could use bottled water if you don’t get as nice a result
For wholemeal, granary, seeded or malted flour use 350g strong white bread flour and 150g of the other flour so you still have 500g total.
For rye, spelt, emmer, buckwheat or Khorasan flour use 400g strong white bread flour and 100g of the other flour so you still have 500g total.
This will create a lot of sourdough. If, however, like me you don’t want to bake everyday i use 30g of flour and 30ml of water. This will produce a 500g loaf at the end, and will keep you with enough starter to go forward again.
Clicking on the image will take you to my Amazon affiliate page where you can buy the same flour.
Here is what your next 7 days will look like:
1.Day 1: The Setup (Completed):24 hours rest.
You’ve mixed your 30g bread flour and 30ml warm water in a clean jar until no dry flour remains. Scrape down the sides, cover it loosely (with a cloth, a rubber band, or just rest the jar lid on top without screwing it down), and leave it for a full 24 hours.
2.Day 2: The First Feed:24 hours rest.
You might see a few tiny bubbles, or you might see absolutely nothing. Both are completely normal.
- Action: Do not discard anything today. Simply add another 30g of bread flour and 30ml of warm water directly to the jar. Stir thoroughly, cover loosely, and let it sit for another 24 hours.
3.Day 3: The Fake-Out Rise:Daily discard begins.
Today you might notice a sudden burst of activity, lots of bubbles, or a strange, sour smell. This is usually caused by opportunistic bacteria, not the actual wild yeast yet—so don’t get discouraged if it goes quiet again tomorrow.
- Action: From today on, you must discard. Stir the mixture, throw away all but 30g of the starter, then feed it with 30g of bread flour and 30ml of warm water (a standard 1:1:1 ratio).
4.Days 4 to 6: Establishing the Routine:Daily 1:1:1 feedings.
The initial burst of activity might slow right down. This is the quiet phase where the good lactic acid bacteria are lowering the pH, making it safe and perfect for the wild yeast to wake up and take over.
- Action: Repeat the Day 3 routine every 24 hours. Stir, discard down to 30g of starter, and mix in 30g of bread flour and 30ml of warm water.
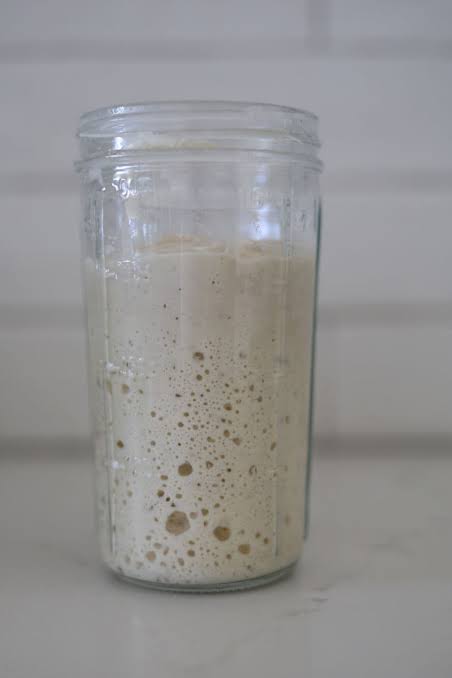
5.Day 7: The Readiness Test: Looking for a reliable rise.
By now, your starter should have a clean, pleasantly fruity or yeasty tang, and it should be showing reliable activity.
Action: Perform your usual discard and feed. Pop a rubber band around the outside of the jar at the starter’s starting level. Watch it over the next 4 to 6 hours. If it doubles or triples in size and is packed with tiny bubbles, it is strong enough to bake your first loaf.
Since you are working with a brilliant, manageable small-batch starter, this recipe is scaled to make one single, beautiful loaf without leaving you with a mountain of excess starter to maintain.
Sourdough doesn’t require intense kneading; instead, it relies on time and a technique called stretch and folds to build structure.
Ingredients & Tools
- Active Starter: 75g (fed 4–8 hours prior so it’s bubbling and active)
- Warm Water: 250g
- Strong White Bread Flour: 375g
- Fine Sea Salt: 8g (roughly 1 tsp)
You will also need a large mixing bowl, a digital kitchen scale, a sharp knife or razor blade to score the dough, and a heavy pot with a lid (like a Dutch oven or cast-iron casserole dish) for baking.
The Step-by-Step Method
1.Mix the Dough: Morning – Day 1.
In your large bowl, weigh out the 250g of warm water and whisk in 75g of active starter until dissolved. Add the 375g of bread flour and 8g of salt. Mix with your hands or a spatula until a shaggy dough forms and no dry flour remains. Cover the bowl with a damp cloth and let it rest for 30 minutes.
2.Stretch and Fold: Over the next 2 hours.
Instead of traditional kneading, you will strengthen the dough in the bowl. Wet your hands slightly. Grab the edge of the dough at the “12 o’clock” position, pull it gently upward, and fold it over the center toward “6 o’clock”. Rotate the bowl 90 degrees and repeat. Do this four times until you’ve gone all the way around.
Perform 3 to 4 sets of these stretch-and-folds, resting 30 minutes between each set. Cover the bowl between sets.
3.The Bulk Ferment (The Big Rise): Afternoon.
Once your stretch-and-folds are done, let the dough rest completely undisturbed, covered, at room temperature. You are waiting for it to grow by roughly 50% in volume, look slightly domed at the edges, and feel airy. Depending on the warmth of your kitchen, this will take 3 to 6 hours.
4.Shape and Cold Proof: Evening.
Gently tip the dough onto a lightly floured surface. Fold the edges into the center to create a taut round ball. Place it smooth-side down into a bowl lined with a well-floured tea towel (or a proofing basket if you have one).
Pop the whole thing into a plastic bag to keep it from drying out, and stick it in the fridge overnight (12 to 15 hours). This stops it from over-rising and develops that classic tangy flavor.
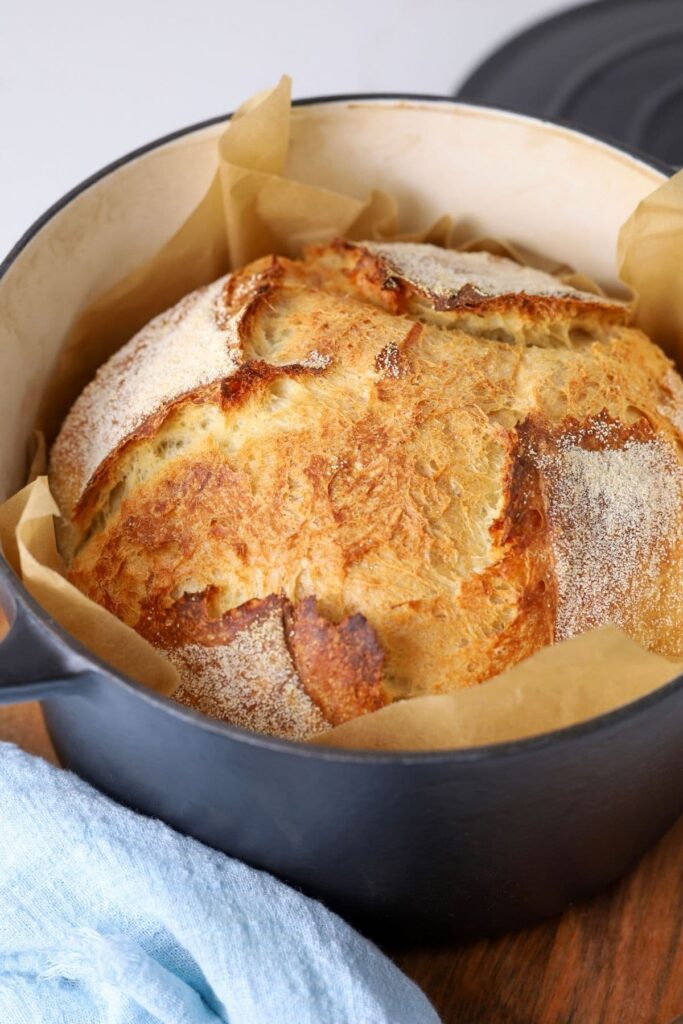
5.Bake with Steam: Next Morning – Day 2.
Put your heavy lidded pot into the oven and preheat to 240°C for a solid 45 minutes. Take the cold dough straight from the fridge, flip it onto a piece of baking paper, and use a sharp blade to slice a swift 1/2-inch deep line across the top (this controls where the bread bursts open).
Carefully lift the paper and dough into the scorching hot pot. Put the lid on and bake for 20 minutes (the trapped steam makes the crust rise beautifully). Remove the lid, drop the temperature to 220°C, and bake for another 20 to 25 minutes until deep golden brown.
The Hardest Part: Let the loaf cool completely on a wire rack for at least one full hour before slicing. If you cut into it straight out of the oven, the residual steam escapes instantly, turning the inside gummy and dense.
Credit for the images goes completely to Pantry Mama please go and checkout her website as it was her recipe that inspired me to try making Sourdough again. She has a really quick recipe here, which you can make in under 3 hours.

Thank You For Visiting The Rambling Tarper